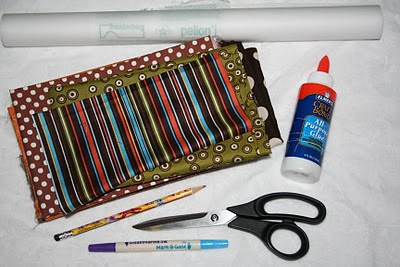
What you will need:
Shirt
4-9 different scraps of fabric, (depending on if you want each feather to be different)
Pellon Wonder-Under (you can find this at Hobby Lobby or Joann, by-the-yard or in a package as shown in link)
Disappearing Ink Pen or fabric chalk
Pencil
Sharp scissors
Sharp scissors
2 Googly eyes (not pictured)
Craft or fabric glue (something that won't wash out with water-Fabric Tac is great, I just didn't haven't any on hand)
Heat n' Bond fusible stabilizer (optional...you can find this at Hobby Lobby or Joann, by-the-yard or in a package as shown in link)
Coordinating thread (optional, not pictured)
Coordinating thread (optional, not pictured)
Iron (not pictured)
First, download the free printable by clicking this link.
Cut out each piece.
Grab your Wonder-Under.
Using a pencil, trace your templates onto the smooth side of the Wonder-Under. Be sure to trace 2 feet and 6 feathers.
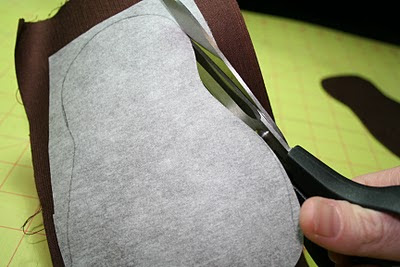
Cut out each piece, just outside of the lines.
Iron your cutouts onto the back (wrong side) of your fabric (following manufacturers directions).
Cut out each piece, on the lines.
Peel the Wonder-under off (you will now have glue on the back (wrong side) of your fabric!
Grab your t-shirt and start arranging your turkey until you like where it is placed (I liked mine centered and about about 3 inches down from the neck opening). Using your disappearing ink pen, chalk or pencil (press lightly and the pencil should come out in the wash), trace your Turkey onto the shirt (do not remove your Turkey yet).
Now grab your fabric feathers and feet. Arrange them, putting the edges slightly under the Turkey (I arranged the feathers from the bottom and worked my way up on each side, overlapping them a bit).
Once you like what you see, remove all of your cutouts (try not to forget what order you put them in, taking a picture might help). Now, take your t-shirt and cutouts over to your ironing board (it's easier to arrange them here rather than having to move them later). Arrange the fabric feathers and feet back onto the t-shirt, using your traced turkey as a guide.
 |
| Notice how I put the curved edge of the feather inside the outline |
 |
| As long as your curved edges are inside the outline you are fine |
Now it's time to iron the beak on.
You are almost done!!! All you have to do now is glue the googly eyes on!
 |
| I am not positive that this glue will last through the wash so be prepared to have glue them back on if using it. |
If you want to sew your Turkey onto your shirt you will want to put fusible interfacing on the inside of your t-shirt. This will keep your shirt from strectching while sewing. Cut the interfacing bigger than your Turkey and iron on (using manufacteres instructions).
I grabbed my coordinating thread and using a zigzag stitch,
I outlined the body, each feather, feet and the beak. Then I put it on my own little turkey :)
 |
| I did have his hair somewhat fixed but the darn wind took over |
If you make a shirt for your little Turkey (and I know you can!) I would LOVE to see it. Please add your pics to the Turkey Flickr group so we all can see! I would also love to hear what you think about my first tutorial (love it, hate it, need more info, etc). This will help me with future tutorials. Comment away!!! Thanks so much!!
Linking up to:
Smiles~Beth
**When washing you should wash inside out on a gentle cycle. Low heat or lay flat to dry. The ends of your fabric will fray just a bit if you didn't sew around them but it adds character :)


5 comments:
This is adorable...as if everything you do isn't adorable!!:-) I want to make the non-sewable kind for my nieces...if I get a minute. If I do...I will send a pic. Great tutorial!!! Thanks.
My friend and I found your blog today while trying to make some Turkey shirts for our kiddos. The shirts turned out GREAT and your tutorial was perfect. I will email you some pics shortly. THANK YOU! Now we need some Christmas ideas!!!
I did one.... Thanks for sharing :)))
Soo cute!! :o)
Did this on a Onesie for my new great-nephew and it turned out so cute! You can check my post out here:
http://sandysewz.blogspot.com/2011/11/lets-talk-turkey.html
Post a Comment