Monday, December 27, 2010

SNOWMAN SHIRT TUTORIAL

Hello friends!  I hope everyone had a wonderful Holiday.  Ours was filled with family, fun and memories.  We are now enjoying the calm after such a busy few days.  

I made my littlest monster this adorable snowman shirt a couple of weeks ago.


He loves it (if you couldn't tell).  I thought it would be fun to share it with you.  It is the season for giving after all.   I had good intentions of getting it posted to you before Christmas but, well, I ran out of time.  So, here it is now.  A simple and quick snowman shirt tutorial...enjoy!

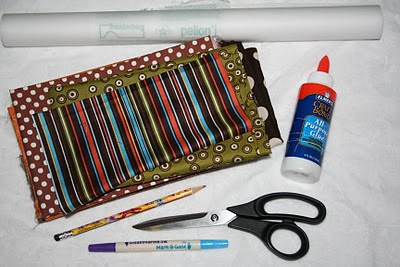
Things you need:


White shirt
Black cotton fabric scraps
Orange cotton fabric scraps
White cotton fabric scraps
Pellon Wonder-Under  (you can find this at Hobby Lobby or Joann, by-the-yard or in a package as shown in link)
Sharp scissors
Pencil
Disappearing ink pen
Iron
Heat n' Bond fusible stabilizer (optional...you can find this at Hobby Lobby or Joann, by-the-yard or in a package as shown in link)
Coordinating thread (optional)
Free template (below)
 
Right click, save to computer, then print from saved document.

The big cirlcle is for the eyes (black fabric)
The small circle is for the eyes (white fabric~2) & for the button mouth (black fabric~5)

Now, you can find all of the details on how to make your own by using my Turkey Shirt Tutorial.
I would love to see pics of your snowman shirts when your done!  If you have any questions please don't hesitate to ask.  Have fun!
Smiles
~Beth

Saturday, December 25, 2010

MERRY CHRISTMAS!

Merry Christmas from our family to yours!  May your day be filled with family, fun and great memories!


Smiles
~Beth

Monday, December 20, 2010

THE COUNTDOWN:5

It's 5 days before Christmas and I am still working on gifts.  I still have at 15 things to make (who needs sleep, right?).  There is a pile of fleece just waiting to become snuggies comfy blankets with sleeves. 

My boys have been asking for one since they came out.  Personally, I think they are silly but I know they will love them.  My sister promises that her boys will love them too (I sure hope so!).  I didn't find much info on how to make them on the internet so I may just have to do a tutorial after the Holidays are over :)  I  have 9 to make.  I am hoping to get at least 4 of them done by days end...wish me luck!

How are you doing with your Christmas projects?  Have you gotten your shopping done yet? Are all of your gifts wrapped (we haven't wrapped 1...yikes!) 

Smiles
~Beth

Saturday, December 18, 2010

A WINNER!

WOW!  429 comments and lots of new followers!  Thanks to Sew, Mama, Sew for hosting Giveaway Day!  And an even bigger THANKS to everyone that visited, read my post and commented.  I had SO much fun reading each of your favorite Holiday traditions.  I even replied to 99% of you!  Many of you enjoy driving/walking around, with hot chocolate in hand, looking at the beautiful display of lights this time of year, decorating the tree, baking cookies, the Advent calendar and going caroling (I didn't realize so many people still did that!).  Christmas Eve jammies were also a tradition that many of you share (including us!). 

I know, I know, you just really want to know who the winner is.  I let www.random.org do the work for me.

And the winner is.......#366

 Kylie said... I'm a new GFC follower.


So thrilled to have you as a follower :)  Kylie also commented that her favorite Holiday tradition was getting new jammies on Christmas Eve (along with her 6 brothers & sisters!).  Congrats to Kylie!  She picked the Buzz Lightyear bag for her nephew...how thoughtful.

So, if any of you happened to read this post you already know that I need to do some destashing.  Since Kylie picked the Buzz Lightyear bag and there were so many of you that really love the American Jane fabric I decided to pick another winner for the fabric.  Yep, that's right, 2 winners!!!  This time I chose the winner (why not?  I did read all of your comments!)

The winner of the fabric is...Karen

K@ren said... This is so generous! Thank you for the chance.  My favorite holiday tradition is from when I was a kid. My mom made us serve dinner at the homeless shelters to remind us what the season is about - giving and sharing and the warmth of the human spirit. Today my daughter and I don't serve dinner every year, but we do give to the community through a service of some kind be it taking donated items to the local nursing home or donating to a family in need. I try to expose her to everything so she remembers what this is about as well, and fosters a love of human kindness and outreach.  Thanks for a great giveaway! All the best to you and yours this season and always. xox

Karen, I just sent you an e-mail. 

Well, this has been fun (really, it has!) but I must get into my disaster of a sewing room and get to sewing some Christmas gifts.  Thanks again for all of your wonderful comments.  I am looking forward to the next Giveaway!

Smiles,
~Beth

Monday, December 13, 2010

SEW MAMA SEW NATIONAL GIVEAWAY DAY


I am so excited to be participating in the Sew Mama Sew giveaway day!  It's so much fun to give stuff away!    I didn't have my own blog last time around but I had SO much fun looking at new blogs and finding inspiration from so many places.

Ok, I won't make you read much more.  I know you all want to know what I am giving away so here it is...

136 charm squares from the Moda line Recess by American Jane
and 2 yards of coordinating fabric from the same line
Don't worry if you don't sew, I have something for you as well...


An adorable Buzz Lightyear bag, perfect for little hands.
(a coloring book fits inside perfectly, along with any
other goodies your little guy may love)
OR...
Tutu tote bag for the little princess in your life
The winner can choose which item they want!  All you have to do to enter is make a comment on this post and tell me what your favorite Holiday tradition is (comments that don't include a favorite holiday tradition will not be eligible to win).  I will ship internationally so everyone is welcome.  You have until December 17th to enter my giveway and don't forget to check out the master list to be entered in hundreds more giveaways!  Item of your choice will be mailed no later than December 20th.  Be sure to include your e-mail address if you do not have your e-mail on your profile.  Otherwise I will not be able to contact you if you win and that would be sad. 

Additional entry:
~Become a follower of this blog and comment letting me know you did so.  Already a follower, leave me a comment reminding me.  (if you commented that you are a follower and aren't one then I will have to pick another winner)

GOOD LUCK!
~Beth

Friday, December 10, 2010

WHAT A MESS!

I can't believe it's been almost 2 weeks since my last post!  Life sure has been busy around here.  Luckily, noone has been ill.  We are just busy.

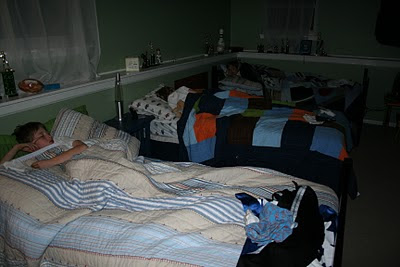
This week the hubby and I decided to work on moving the boys downstairs.  2 of them already shared room but the oldest monster always seemed to end up in one of his little monster's brother's beds.  A great friend of mine gave me a great idea (thanks Terra!!)  Why not put all of the boys in the room downstairs (previously a play room/sewing room).  Doing so would give the boys their own play area and me my very own sewing room (oh my, do I have WAY too much fabric).  I should just admit right now that I am an addict.  There, I said it.  I am a fabricholic.  I digress.  Over the past few weeks I have been attempting to clean out the 3 rooms involved in this task.  I took pictures of the process but can't seem to find the card they are on (I really need to find that!).   Anyway, here is a pic of our little monsters sleeping in their new room.  Sorry, the pic is very dark.  They were sleeping afterall and I didn't want to turn the light on.


There is still alot of work to be done like painting the room a more neutral color and hanging things on the walls but they don't seem to mind.  They are just happy to all be in the same room together...who knew?

My sewing room is going to take a while to get into shape.  Here is what it looks like now...YIKES!


I know, I know, it is a disaster area.  The room will stay the light blue it was when Monsters 2 & 3 where in there.  It's kinda relaxing (which I need!).  I will get to the organizing and hopefully destashing over the next few weeks.  For now I am just going to have to try and ignore the mess until after my sister's baby shower and Christmas.  There is just too much other stuff to do (like sew, sew, sew!).  Oh, and finish up my Holiday shopping!

What have you been up to over the past couple of weeks?

Smiles
~Beth

Sunday, November 28, 2010

OH CHRISTMAS TREE...

I have fond memories of picking out our family Christmas tree every year when I was a kid.  My sister, brother and I waited in anticipation for my Dad to get home from work.  We would all load up in the stationwagon (boy was that thing ugly!) and head over to Our Lady of Lourdes Church to buy our beloved tree.  We would all run around searching for the perfect one.  Each of us standing by the one we thought would be the "chosen" one.  Screaming "Mom, Dad, come look at this one!"  We didn't always bring home the one I picked out which caused a little disappointment but not enough to keep me from enjoying decorating the tree once we got home.  Putting on tinsil (which I don't use now...what a mess!) was my absolute favorite thing to do.  As we got older, we didn't help much with the decorating and my Mom eventually put up a fake tree (actually, she puts up 5!!!).  They are all beautifully decorated.

When I moved out of my parent's house xx years ago there was no doubt that I would be getting a real tree once Christmas came around.  Now that I am married and we have 3 boys I am SO happy to carry on the tradition of getting our family tree each year.  Today, we went on an adventure at Pumpkins and Pines to find the perfect one (and I think we found it!).  It's even more enjoyable now to see my boys having so much fun.  It brings back so many wonderful memories from my childhood.   Here are some pics of our little adventure...

A little fun on our walk up to all of the trees...

Boys will be boys

no matter how old :)

The search is on!


We found it!!  Thankfully everyone agreed so there were no tears :)

Each of the boys took a turn at cutting down the tree...


While Dad took over the boys played hide and seek.


Tag!  You're it!

We hitched a ride back up to the shop. 


Silly boys!

 
Our view on the way back...so beautiful.


Sipping on some hot chocolate while waiting for our tree to be shaken...yummy!

 No matter if you go on your own adventure to find the perfect tree or if you simply take a trip into your storage area to get your tree the memories are sure to be treasured by you and your family.  I would love to hear about any Christmas tree traditions you have :).  Happy decorating!!

~Beth


Wednesday, November 24, 2010

I AM THANKFUL FOR...

I was rushing around my house today trying to get things picked up and clean while also make a gazillion (yes, I know that is alot) things for our Thanksgiving celebration tomorrow.  I began to feel frustrated and I yelled at the boys.  They didn't really do much to deserve it, they were just being boys.  I stopped and thought for a moment...this in not what Thanksgiving is about.  I decided to sit down, take a break (eat one of the delicious pumpkin chocolate chip cookies I baked today using this recipe from MADE...yummy!) and really think about some of the things I am thankful for.

1. My one-of-a-kind family.  They keep me going and are my biggest fans.  Oh, how I love them!!
2. Our health, both mentally and physically (ok, so my mental health is questionable depending on the day but I am still thankful for the brains God gave me ;o)
3. My friendships in life...both new & old and also for the ones in blogland :)
4. My sewing machine.  It may sound funny to you but it truly brings much joy in my life.  Afterall, you wouldn't be reading this right now if it weren't for that little machine.

I am also thankful for the pictures I received from a couple of readers showing off the Turkey shirts they made using my tutorial.  Thanks for making me smile :)


made by Lacey

made by Jeanette
Made by Mendi

I would love to hear what you are thankful for.  Feel free to leave me a comment.

Happy Thanksgiving!

~Beth

Wednesday, November 17, 2010

CROSSING THINGS OFF

It is such a wonderful feeling to get things crossed off my long list.  I still have a ton more things to complete by Christmas but thanks to a productive week I was able to get a bag, 9 shirts and a cape done...whew!  I forgot to take pics of the bag, oh well. 

such a lovely stack of completed to-do's
These 2 initial tees are for an order
I couldn't find a font on liked in Word so I ended up freehanding the initials

I made 3 of these.  1 for each of my monsters :)
I made 3 of these for an order

I made another cape (that's my littlest monster testing it out for me ;o)
Super Kaden!
The other side is a Jayhawk.  As in the KU Jayhawks. 
Did you know that Tigers eat Jayhawks ;o)
And last, but certainly not least, I finished the Monster Shirt from my giveawayI have to say that this is probably my 2nd favorite monster so far!  I hope the recipient likes it as much as we do :)  All 3 of my little monsters asked if I could make one for them! 

I think I will name him Miles (wink, wink @ Angie)

Have you been crossing things off of your list? 

Oh, don't forget to send me pics of the Turkey shirts you have made.  I have received a few and would love to post them all a little closer to Thanksgiving.  If you have a blog I will happily link to it as well.

That's it for now.
Smiles
~Beth

Wednesday, November 10, 2010

TURKEY SHIRT TUTORIAL AND TEMPLATE

With Thanksgiving a mere 15 days away I decided it was time to make my littlest monster a Turkey shirt.  As I was cutting out my template I realized this was a project that ANYONE could do, not just the ones of us that sew.  I decided to make this my very first tutorial!  If you have any questions please let me know (I am sure I missed something obvious).


What you will need:


Shirt
4-9 different scraps of fabric, (depending on if you want each feather to be different)
Pellon Wonder-Under  (you can find this at Hobby Lobby or Joann, by-the-yard or in a package as shown in link)
Disappearing Ink Pen or fabric chalk 
Pencil
Sharp scissors
2 Googly eyes (not pictured)
Craft or fabric glue (something that won't wash out with water-Fabric Tac is great, I just didn't haven't any on hand)
Heat n' Bond fusible stabilizer (optional...you can find this at Hobby Lobby or Joann, by-the-yard or in a package as shown in link)
Coordinating thread (optional, not pictured)
Iron (not pictured)

First, download the free printable by clicking this link.


Cut out each piece. 

Grab your Wonder-Under.

Using a pencil, trace your templates onto the smooth side of the Wonder-Under.  Be sure to trace 2 feet and 6 feathers. 


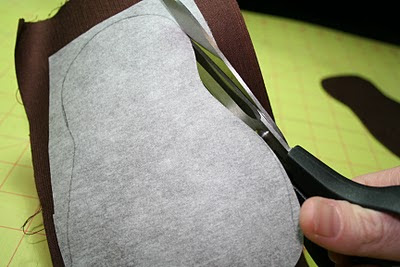
Cut out each piece, just outside of the lines.

Iron your cutouts onto the back (wrong side) of your fabric (following manufacturers directions).


Cut out each piece, on the lines.


Peel the Wonder-under off (you will now have glue on the back (wrong side) of your fabric!


Grab your t-shirt and start arranging your turkey until you like where it is placed (I liked mine centered and about about 3 inches down from the neck opening).  Using your disappearing ink pen, chalk or pencil (press lightly and the pencil should come out in the wash), trace your Turkey onto the shirt (do not remove your Turkey yet).

Now grab your fabric feathers and feet.  Arrange them, putting the edges slightly under the Turkey (I arranged the feathers from the bottom and worked my way up on each side, overlapping them a bit).


Once you like what you see, remove all of your cutouts (try not to forget what order you put them in, taking a picture might help).  Now, take your t-shirt and cutouts over to your ironing board (it's easier to arrange them here rather than having to move them later).  Arrange the fabric feathers and feet back onto the t-shirt, using your traced turkey as a guide.

Notice how I put the curved edge of the feather inside the outline

As long as your curved edges are inside the outline you are fine
Get your turkey.  Place him on top of your feathers, using your outline as a guide.  Iron your Turkey, feathers and feet in place (following manufacturers directions).


Now it's time to iron the beak on.


You are almost done!!!  All you have to do now is glue the googly eyes on!

I am not positive that this glue will last through the wash so be prepared to
have glue them back on if using it.
Hooray...you are done!!  Now step back and pat yourself on the back for making your son/daughter such a darling little Turkey shirt.


If you want to sew your Turkey onto your shirt you will want to put fusible interfacing on the inside of your t-shirt.  This will keep your shirt from strectching while sewing.  Cut the interfacing bigger than your Turkey and iron on (using manufacteres instructions). 

I grabbed my coordinating thread and using a zigzag stitch,


I outlined the body, each feather, feet and the beak.  Then I put it on my own little turkey :)

I did have his hair somewhat fixed but the darn wind took over
If you make a shirt for your little Turkey (and I know you can!) I would LOVE to see it.  Please add your pics to the Turkey Flickr group so we all can see!  I would also love to hear what you think about my first tutorial (love it, hate it, need more info, etc).  This will help me with future tutorials.  Comment away!!!  Thanks so much!!

Linking up to:
HookingupwithHoH

Smiles~Beth

**When washing you should wash inside out on a gentle cycle.  Low heat or lay flat to dry.  The ends of your fabric will fray just a bit if you didn't sew around them but it adds character :)