Monday, November 28, 2011

DRUNKARD'S PATH QUILT~A~LONG {FINISHED TOP}

Whew!  What a busy week!  It was so nice to be able to spend our Thanksgiving with all of our family but after 3 celebrations I was exhausted ;)  A little relaxation and some quality time with my sewing machine was just what I needed yesterday.  I was able to get my DP quilt top done (and on time!)...whoo hoo!!!


I want to give Kristie from OCD and Kate from Needle and Spatula a BIG thanks for hosting the DP Quilt~a~long.  They challenged me to step out of my sewing comfort zone with all of those curved seams and I am so happy I did.  This is the first quilt I have made for myself and I absolutely love how it turned out!  So much that I am going to send it out to be quilted.  It deserves better than my not~so~straight quilting ;)  I also have thoughts of another DP quilt with this layout in black and white.

You can see more great DP quilt finishes here

You can also find more inspiration for all kinds of sewing projects at the blogs below.  Just click on the picture or link.

Linking up to:

 
Finish it up Friday @ Crazy Mom Quilts
Hope your day is splendid!
Smiles~Beth

Thursday, November 24, 2011

HAPPY THANKSGIVING

It's a very busy time around here but I wanted to pop in and say hello and wish all of you a very Happy Thanksgiving.  If you aren't from the states then I wish you a very happy day.

Today I am most thankful for my family.  I feel so blessed to be able to spend this Holiday with so many people I love.  Of course, these little monsters make me feel blessed everyday!


I hope that no matter where you are today that it was spent with those you love most and filled with wonderful memories.

Smiles~Beth


Friday, November 18, 2011

MINI QUILT {OR MUG RUG} FOR 'Qq' DAY

My littlest monster is in Kindergarten.  This week his class was learning about the letter 'Qq'.  Adam was eager to tell his class that 'quilt' begins with the letter 'Q' and that his Mommy makes them.  I was then asked by his teacher if I had any quilts to share with the class.  You would think that the obvious answer would be yes but surprisingly I don't have 1 (not 1!) finished quilt that lives in our house.  Shameful, I know.  I have made plenty (you can see some of them here) but I have given them all away.  My poor children!! 

Anyway, I knew I couldn't make a quilt in just a few days (of course, I probably could have finished one of the 7 quilts that I have in progress. oh well) so I decided to make a mini quilt (or mug rug but mug rug doesn't go with 'Q' day).

Finished size 10"x 7.5"
Print fabric is OZ by Sanae for Moda and the solid is Kona Cotton in Bone
  I based it off this tutorial by Amanda Jean from Crazy Mom Quilts but cut my strips 1.5" (I also used this fabulous tutorial to make Adam's quilt, which STILL isn't finished! I am such a slacker). Perfect size for little hands to pass around.  And for fun, I sent one of my quilt tops in so the kiddos could see what all of those seams look like on the back.  It will be interesting to hear what all the kids thought of them.

If you have an extra minute I recommend you check out all of the inspiration over at the blogs below.
Linking up to:


Hope you have a happy Friday!
Smiles~Beth


Tuesday, November 15, 2011

WINTER DINO HAT {FOR MY LITTLE GUY}

It's starting to feel a little more like Fall around here.  With the colder weather coming I thought it was time to make my little guy a new warm hat. 

The bottom scale isn't really all crumpled...guess I should have fixed that, oops!
I followed this great tutorial by Christine at From an Igloo, thanks Christine!  It has been in my favorites and then moved to one of my Pinterest boards for awhile now.  I love that it easily covers his ears and the back of his neck so I don't have to worry about him being warm enough at recess.  It went together so quickly that I may just make him another one but maybe a monster version...we love monsters around here! 
 (The only thing I did differently to the hat was to add a tacking stitch in the top of the hat to help keep both layers together while taking it off his head.)

In case your wondering, my little guy LOVES it!

He is such a goofball!

Happy Tuesday!
Smiles~Beth
 
Linking up to:
 
 
HookingupwithHoH

Friday, November 11, 2011

NO SEW T~SHIRT TO NECKLACE ReFASHION {TUTORIAL}


I have this outfit pinned on Pinterest.  I love that it is simple enough for me to actually try to pull off.  I already have jeans in my closet, a pluthera of white tanks (for layering) and I even have a simlar color lightweight sweater.  All I really needed was some leopard shoes and a red scarf.  The shoes were not a problem (every girl could use another pair of shoes!).  Although the flats pictured are cute, I like some height on my shoes (I am only 5'4"). I found these cute pumps at DSW (I had a gift card so I only paid $15 for them...bonus!). 
LOVE!!!
Now, the scarf (or snood) was harder for me.  The one pictured is $25.  I guess that's reasonable but I couldn't justify spending the $ on it.  Besides that, my big thick hair doesn't usually mix well with scarves.  They are OK when worn with a coat but not so much for an all day accessory (they make my hair poof out even more than usual...not a good thing!).

Then it hit me!  About a month ago I saw a fellow football Mom cutting up a t~shirt before a game.  Yep, right there on the bleachers...you got love that, ha!  I just had to inquire...  she was making a fabric necklace out of a t~shirt...what?!
Pretty darn cute for a men's tee, huh?!
Wanna make your own?

Here is what you need:

1. T~shirt (old or new, prewashed)  I bought a new mens XL shirt from Target for $7.  It was the perfect color for me (dark red) and it didn't have seems down the sides of the shirt, that is not necessary but I like the cleaner look.  You could easily get a tee for less at a thrift store or raid your husband's/boyfriend's closet ;)
2. Rotary cutter or scissors
3. Quilting ruler & cutting mat (only if using a rotary cutter)


 Ok, now cut the hem off the bottom of your tee (you don't need it for this project).  Then smooth your tee out and cut 1/2"~1" strips (I cut 1" strips for mine) until you reach the arms of the shirt.

You should have a pile like this (I got 13 strips out of my shirt).

Separate the strips so they look like this

One nice big circle of fabric :)
Pick them up 4~5 at a time and stretch them out (this will cause them to roll up).  It's always nice to have a helper ;)


I wanted my strips to stay together so I snatched them all up and wrapped a smaller strip around them, like this...

Tie tails in a knot to keep in place
Snip the tails and tuck under
You could stop here and wear it long.

Or you could do what I did and double it to make a shorter, fuller necklace.  To do that, cross your strips...


Then pull it over your head to get this look.


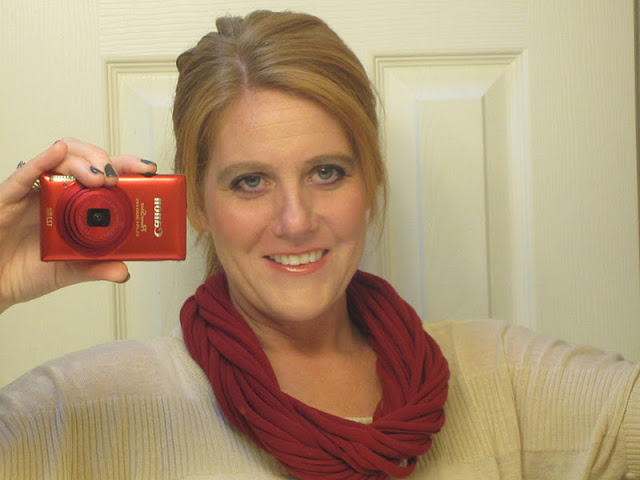
I don't wear my hair up much so I had to test it out with my hair down too.

Not too bad!

I have to say that I am loving this new accessory.  For only $7 and about 20 minutes of my time to make, it RoCkS!

Let me know if you have any questions.

Linking up to:

HookingupwithHoH


Photobucket


Photobucket
Smiles~Beth

Tuesday, November 8, 2011

DRUNKARD'S PATH QAL {PROGRESS}

I did it!  I finished sewing ALL 325 blocks together for the Drunkard's Path quilt~a~long! And, on time!  Happy dance!!


I have to admit that not all of my blocks look this pretty.  Although they are all sewn together I still have piles of blocks that look like this...

Ironed and ready to be squared up

and this...

Sewn, ready to be ironed & squared up
The hard part is over for me.  Sewing all of the curved seems definately took me WAY out of my sewing comfort zone. After conquering so many blocks I might even dare to call myself a pro at it (well, maybe not yet but definately closer!).  I am looking forward to getting all of these small blocks sewn into larger blocks and then into a quilt top. Now that there are only straight seems left to sew it should go by rather quickly, whew!

It's not too late to join in over at OCD {Obsessive Crafting Disorder} or Needle and Spatula.  Come on, it will be fun!

Smiles~Beth

Sunday, November 6, 2011

FABRIC LOVE {ECHO BY LOTTA JANSDOTTER)

Have you seen the new fabric by Lotta Jansdotter?
I fell in love with it when I saw this post over at Film in the Fridge and then again when Anna of Noodlehead made a few of her Go Anywhere Bags with it (oh how I love that bag!).  Ever since I have been patiently waiting for ECHO to arrive in online stores.  I was so happy to hear that it was available early at Hawthorne Threads and I immediately ordered some for myself.


Left to right: Stepping Stones in Yellow, Spring Buds in Grey, Small Spring Buds in Grey, Spring Buds in Espresso, Small Spring Buds in Espresso, Scattered Pods in Agave, Small Spring Buds in Mustard, Spring Buds in Mustard

Spring Buds in Mustard is my favorite!!


I think Standing Stones in Yellow will make a fabulous throw pillow.

The colors are beautiful and the fabric is soft, I can't wait to make something using them.  I might even use the Spring Buds in Mustard to make myself a skirt.  I think it would look great with some boots!

I do want to note that the Spring Buds in Grey seems to be a little darker (with a hint of purple) than the other grey prints (I wonder if anyone has this issue?).  Still beautiful though! 

Are there any new fabrics you are excited about?

Smiles~Beth

Thursday, November 3, 2011

FALL WREATH TUTORIAL

While perusing Pinterest one evening (oh my goodness, I could spend hours wasting time finding inspiration on there!) I came across this Fall wreath.  I knew right away that I wanted to make one of my own.  So I did!


Want one for yourself?

Here is what you need:
~Spanish Moss, large bag you will have extra
~Styrofoam wreath or you could try this cheaper version
~Burlap, 1/3 yard finished strip 55"x 5", you will have to piece it together
~Fake pumpkins or whatever you want to add to your wreath :)
~Glue gun
~Glue sticks for glue gun
~Spray glue I used Elemer's Craft Bond & Aleene's Crystal Clear Tacky Spray
~Brown paper sacks or something else to protect your surface while using spray glue
Sewing machine & thread optional

Be warned that this project is messy!

First, open up that bag of Spanish Moss, loosen it up (it's all compressed together, you will want to break it up so it is easier to apply to your wreath) and then spray a small section of your wreath with spray glue.  Grab your loosened up Spanish Moss and press it down on top of your wreath.


Using spray glue, add the Spanish Moss in small sections all the way around the wreath until the top is covered.  Then add the Spanish Moss to the sides of the wreath, inside and out (you could do this when you do the top).
It should look like this when you are done...
Front view
Back view
 I did the back of my wreath next but you don't have to
(noone will see it once it is hanging).

Now grab those cute little pumpkins (or other Fall decor) and figure out where you want them placed on your Spanish Moss covered wreath.

When you are happy with your placement grab your glue gun and put some glue on the necessary spots.

Your wreath should look similar to this...


Now is the time to add more Spanish Moss to any bare spots you may have.

See where you can see the styrofoam...add more Spanish Moss if you can see foam on your wreath.

You are almost done!
Cut the width (selvedge to selvedge) of your burlap into 5" strips. 


I sewed 2~5" strips together which was too long for me
(if you don't have a sewing machine or don't feel like sewing you could use your glue gun to keep the 2 pieces together) I folded my long strip in half lengthwise,
at the seam, and cut (folded at the seam) to 27.5" inches. 
This gave me 1 strip measuring 5"x 55" with the seam in the center.

Grab your wreath and put your burlap strip through the
center (with seam at the under part of the top of the wreath, that way you can't see it). 

Make a bow at the top, hang, and now you have your own
Fall wreath...yay you!!!


Hope you enjoy your new Fall Wreath as much as I do mine!
Please feel free to ask any questions you may have.

Linking up to :
HookingupwithHoH


Made by you Monday @ Skip to my Lou
Smiles~Beth